Roasting a chicken sounds simple: season, pop it in the oven, and wait. But ask any chef or experienced home cook, and they’ll tell you that roasting chicken is deceptively easy to mess up. A few small oversights—like skipping a crucial prep step or using the wrong temperature—can result in a dry, rubbery bird or worse, an undercooked center.
In fact, many common mistakes start well before the bird hits the oven. From improper seasoning to moisture retention, it’s often what you don’t do that makes all the difference. For example, forgetting to dry the skin properly could result in soggy, pale chicken instead of that golden, crispy exterior everyone craves. That’s why experts emphasize avoiding soggy skin with these expert tips as a key step before roasting.
Another common pitfall is mismanaging your oven’s heat. According to Bon Appétit’s guide to roast chicken mistakes, not understanding temperature control and heat distribution can result in uneven cooking and dry breast meat. These problems often go unnoticed until the final carve—which is far too late to fix.
🔥 Why Roasting Chicken Goes Wrong More Often Than You Think
Roasting may be one of the oldest cooking techniques, but it remains one of the most nuanced. Many recipes oversimplify the process, leading beginners to believe it’s foolproof. But the truth is, roasting a whole bird requires more technique than tossing it in the oven.
Common Misconceptions:
- “Chicken is done when it looks golden.” – False. Only a thermometer can verify doneness.
- “Moisture keeps it juicy.” – True only if the skin is dry when going into the oven.
- “Covering helps retain heat.” – It also traps steam, sabotaging crispy skin.
Understanding what not to do is the first step to mastering the perfect roast. In the sections that follow, we’ll dive deep into the critical mistakes to avoid, expert fixes, and science-backed tips that will elevate your roast chicken from average to extraordinary.
In Part 2, we’ll uncover the most overlooked preparation errors, like not patting the bird dry or salting it properly, and explain how these steps set the stage for a fail-proof roast.
🥣 Part 2: Preparation Mistakes Before Roasting
The key to a perfect roast chicken starts long before you fire up the oven. Preparation mistakes can ruin your roast before it ever touches the roasting rack. From choosing the wrong bird to skipping salt, every decision matters. Let’s walk through the most common preparation pitfalls—and how to fix them like a pro.
❌ Mistake #1: Buying the Wrong Chicken
- Water-Chilled vs. Air-Chilled: Water-chilled chickens tend to retain more moisture, which can lead to soggy skin. Air-chilled birds have drier skin that crisps up beautifully when roasted.
- Size Matters: Oversized birds (over 5 lbs) take longer to cook and often result in overcooked breast meat. Stick to 3.5–4.5 lbs for best results.
- Choose Quality: If possible, opt for pasture-raised or organic chickens. The flavor and texture are superior.
❌Mistake #2: Roasting Cold Chicken
- Pulling chicken straight from the fridge and into the oven causes uneven cooking.
- Let your chicken rest at room temperature for 30–45 minutes before roasting.
❌ Mistake #3: Not Patting the Skin Dry
Moisture is the enemy of crispy skin. If the surface of your chicken is damp, it will steam instead of roast.
- Use paper towels to pat the skin completely dry.
- For ultra-crispy skin, leave the chicken uncovered in the fridge overnight to air-dry.
❌ Mistake #4: Skipping the Salt
Salt is not just a seasoning—it’s a texture enhancer and flavor developer.
- Dry-brining: Sprinkle kosher salt generously all over the bird at least 8–12 hours before roasting.
- Salt helps draw moisture from the skin and reabsorbs it into the meat, enhancing juiciness.
- Don’t forget the cavity and under the wings.
❌ Mistake #5: Not Stuffing the Cavity with Aromatics
Adding flavor starts from the inside out. A few simple ingredients can turn a bland roast into a restaurant-quality dish.
- Try adding a halved lemon, fresh thyme, rosemary, sage, garlic cloves, or a cut onion inside the cavity.
- As the chicken roasts, steam from these ingredients infuses the meat with subtle flavor.
Pro tip: Want to use the drippings for a side dish or soup? Don’t miss this comfort food recipe that uses roast chicken broth.
🔍 Quick Recap: Avoid These 5 Mistakes
- Don’t buy oversized, water-chilled chickens
- Never roast a cold bird—bring it to room temperature
- Always dry the skin thoroughly before seasoning
- Use salt generously and early for best results
- Stuff the cavity with herbs, citrus, or garlic for added flavor
With your chicken properly prepped, it’s time to move to the oven—but that’s where even more mistakes await. In Part 3, we’ll look at roasting technique mistakes, including oven temperature blunders, pan choice, and the myths of basting and flipping.
🔥 Part 3: Roasting Technique Mistakes
You’ve picked the right bird, salted it well, and prepped it perfectly—now comes the main event: roasting. But even with the best preparation, poor oven technique can ruin your chicken. From incorrect oven temps to skipping thermometers, here are the most common roasting mistakes and how to avoid them.
❌ Mistake #1: Using the Wrong Oven Temperature
One of the most debated topics is temperature. Some swear by low and slow; others prefer hot and fast. The reality? Both can work—but each has a specific goal.
- Low (325°F–350°F): Slower, gentler cooking that helps cook the bird evenly.
- High (400°F–450°F): Excellent for crispy skin but can lead to overcooked breast meat if timing isn’t perfect.
- Best practice: Start at 425°F for 20 minutes, then lower to 375°F to finish.
❌ Mistake #2: Not Using a Thermometer
The only foolproof way to know your chicken is done is to use a digital meat thermometer. Visual cues like golden skin or clear juices aren’t reliable.
- Insert thermometer in the thickest part of the thigh (not touching bone).
- Safe internal temp: 165°F (74°C).
Need help learning the right way? This guide on how to use a digital thermometer breaks it down step by step.
❌ Mistake #3: Using the Wrong Pan
Your roasting vessel matters more than you think. A poor pan choice can lead to steaming instead of roasting.
- Deep roasting pans: Trap steam = soggy skin
- Shallow sheet pans or cast iron: Promote air circulation = crispier results
- Use a rack to lift the bird off the bottom and allow even airflow
❌ Mistake #4: Flipping or Basting Too Often
It’s tempting to baste every 10 minutes or flip the bird halfway—but these actions can actually sabotage your results.
- Basting: Opens the oven and lowers the temp each time
- Flipping: Disrupts the skin, making it soggy or uneven
- What to do instead: One or two bastes max, if any—focus on good prep and oven heat
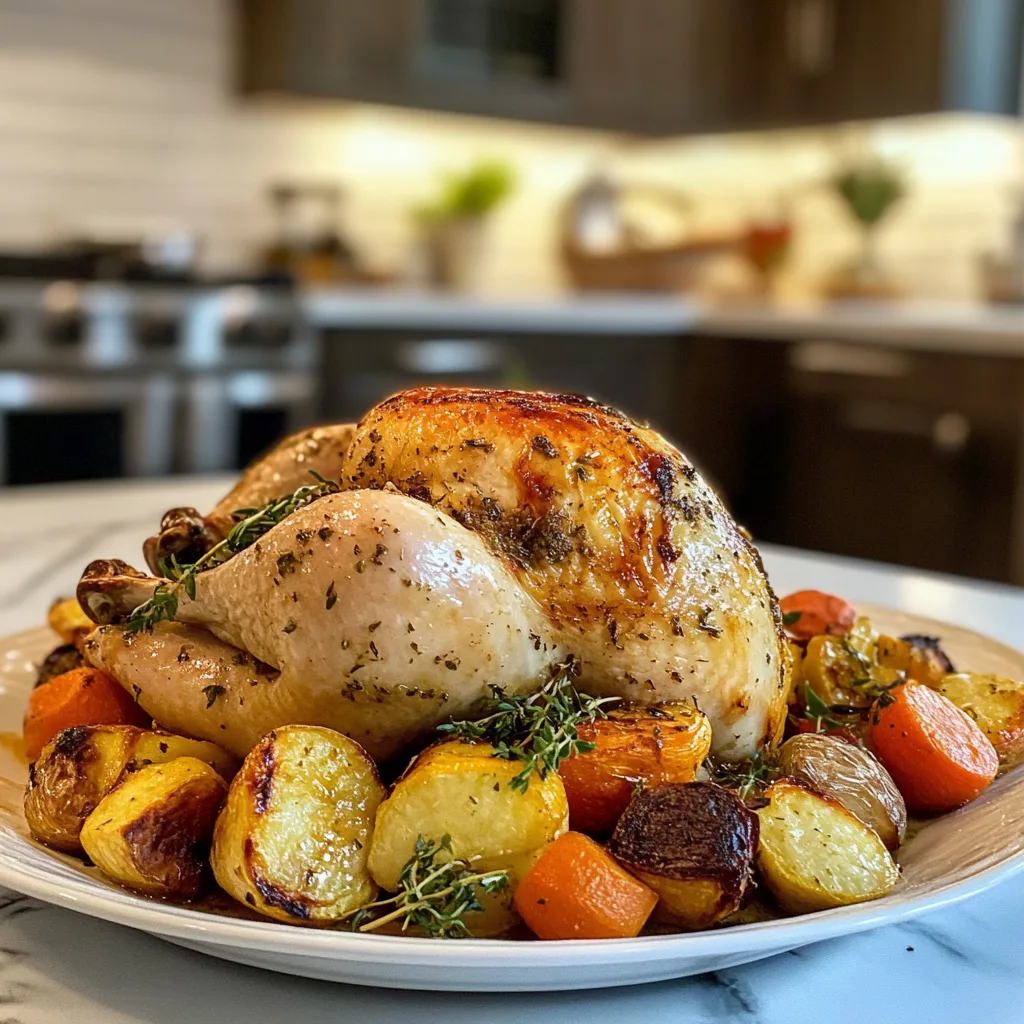
❌ Mistake #5: Skipping the Veggie Bed
Roasting your chicken on a bed of vegetables serves two purposes: it prevents sticking and infuses flavor into your side dish.
- Use root vegetables like carrots, onions, and parsnips
- They’ll absorb the chicken fat (schmaltz) and caramelize beautifully
- Don’t waste that golden fat—Bon Appétit explains why schmaltz is a flavor goldmine
📌 Quick Summary: Fix These Roasting Mistakes
- Use an oven temp strategy that balances crispy skin with juicy meat
- Always use a meat thermometer—guessing is a gamble
- Choose a shallow roasting pan or sheet tray for proper airflow
- Minimize flipping and basting to protect your skin crust
- Roast over vegetables for a built-in side dish and enhanced flavor
Now that you’ve mastered the oven, what happens after the bird comes out is just as important. In Part 4, we’ll cover post-roast mistakes—including resting, carving, and what to do with those delicious pan drippings.
🍽️ Part 4: Post-Roast Mistakes & Serving Tips
Your chicken is perfectly golden and smells amazing, but don’t celebrate just yet—what you do after roasting can make or break the final result. Many cooks jump straight to carving or forget to rest the bird, causing juicy meat to turn dry or stringy. Let’s break down these often-overlooked but critical finishing steps.
❌ Mistake #1: Not Letting It Rest
Roast chicken needs time to rest after cooking. Why? Because resting allows the juices to redistribute throughout the meat instead of spilling out when you cut into it.
- Let the chicken rest for at least 15–20 minutes uncovered.
- Use a wire rack or cutting board with a drip groove to catch juices.
If you’re unsure about resting times or technique, check out this guide on why chicken resting time matters.
❌ Mistake #2: Carving Too Soon or Incorrectly
Carving a hot bird not only burns your fingers, but it also causes precious juices to escape.
- Wait until the bird is cool enough to handle (post-resting).
- Use a sharp chef’s knife—not a serrated knife or dull blade.
- Remove the legs and thighs first, then carve the breasts in long slices against the grain.
❌ Mistake #3: Tossing the Pan Juices
The juices and fat (aka schmaltz) left in the pan after roasting are a culinary treasure. Don’t toss them!
- Deglaze the pan with wine or broth for a quick gravy or sauce.
- Use the drippings as a base for soup, like this Swamp Soup Recipe that turns leftovers into comfort food magic.
- Store schmaltz in the fridge—it’s perfect for roasting vegetables or frying eggs.
❌ Mistake #4: Poor Storage Practices
Leftover chicken is incredibly versatile—but only if stored properly.
- Cool the chicken fully before refrigerating.
- Store in airtight containers for up to 4 days.
- Freeze cooked chicken for up to 3 months.
- Remove bones if freezing—this saves space and reduces freezer burn.
❌ Mistake #5: Serving It Plain
Presentation elevates your roast from rustic to refined. Just a few finishing touches can impress guests or elevate a weeknight dinner.
- Garnish with fresh herbs like thyme or rosemary.
- Add citrus wheels (lemon or orange) for visual and aromatic flair.
- Serve with roasted veggie sides, grain salads, or warm bread.
Want to turn leftovers into lunch? This Healthy Chicken Wrap Lunch Box is a great way to repurpose roast chicken into something fresh and satisfying.
✅ Quick Summary: What to Do After the Roast
- Rest the bird—this step is non-negotiable
- Carve properly using sharp tools and correct technique
- Use the pan drippings—don’t pour that gold down the drain
- Store leftovers smartly for maximum flavor and freshness
- Plate like a pro with garnishes and smart side dishes
In Part 5, we’ll wrap up with a full FAQ section, top chef tips, and rich keyword strategies to help this guide perform well for search engines—and help you roast the best chicken of your life.
❓ Part 5: FAQs, Expert Tips & Final Summary
Frequently Asked Questions (FAQs)
Should I rinse chicken before roasting?
No. Rinsing raw chicken increases the risk of spreading bacteria. Pat it dry instead to improve skin crispiness. The CDC strongly advises against rinsing raw poultry.
Why is my roast chicken rubbery?
It may be undercooked or roasted at too low a temperature. Not resting the bird can also cause meat to seize and feel rubbery.
Is it better to roast chicken covered or uncovered?
Always roast uncovered if you want crispy skin. Covering traps steam, making the skin soft and rubbery.
How do you know when a roast chicken is done?
Use a digital thermometer. The thickest part of the thigh should read 165°F (74°C).
Should I baste a roast chicken?
Minimal basting is okay, but it’s often unnecessary with a well-prepped bird. Basting can interrupt oven heat and make the skin soggy.
👨🍳 Expert Tips for Roast Chicken Perfection
- Use compound butter under the skin for flavor and moisture
- Dry-brine overnight for ultra-juicy meat and crispy skin
- Let the bird rest uncovered before carving
- Roast over a veggie bed for built-in side dishes and better airflow
- Don’t crowd the oven—air circulation is key to even roasting
🔍 LSI & SEO Keyword List
- how to roast a chicken evenly
- chicken roasting temperature
- crispy roast chicken tips
- meat thermometer chicken guide
- roasting chicken uncovered
- how to carve roast chicken
- roast chicken food safety
- what temp is chicken done
- roast chicken dripping uses
- juicy oven-roasted chicken
🔗 Internal Linking from CharlieRecipes.com
🌐 External Resources (Non-Competitive)
✅ Final Takeaway: Roast Chicken is a Skill Worth Mastering
Whether you’re cooking for family, meal prepping for the week, or trying to impress dinner guests, mastering the roast chicken is a rite of passage for any home cook. By learning what not to do—from prep to plate—you’ll avoid dry meat, rubbery texture, and flavorless results.
Follow these expert-backed techniques, avoid common mistakes, and always use a thermometer. With a little planning and the right tips, your roast chicken will become the centerpiece it deserves to be—golden, juicy, and unforgettable.
1 thought on “What Not to Do When Roasting a Chicken: Common Mistakes and Expert Tips”
Comments are closed.