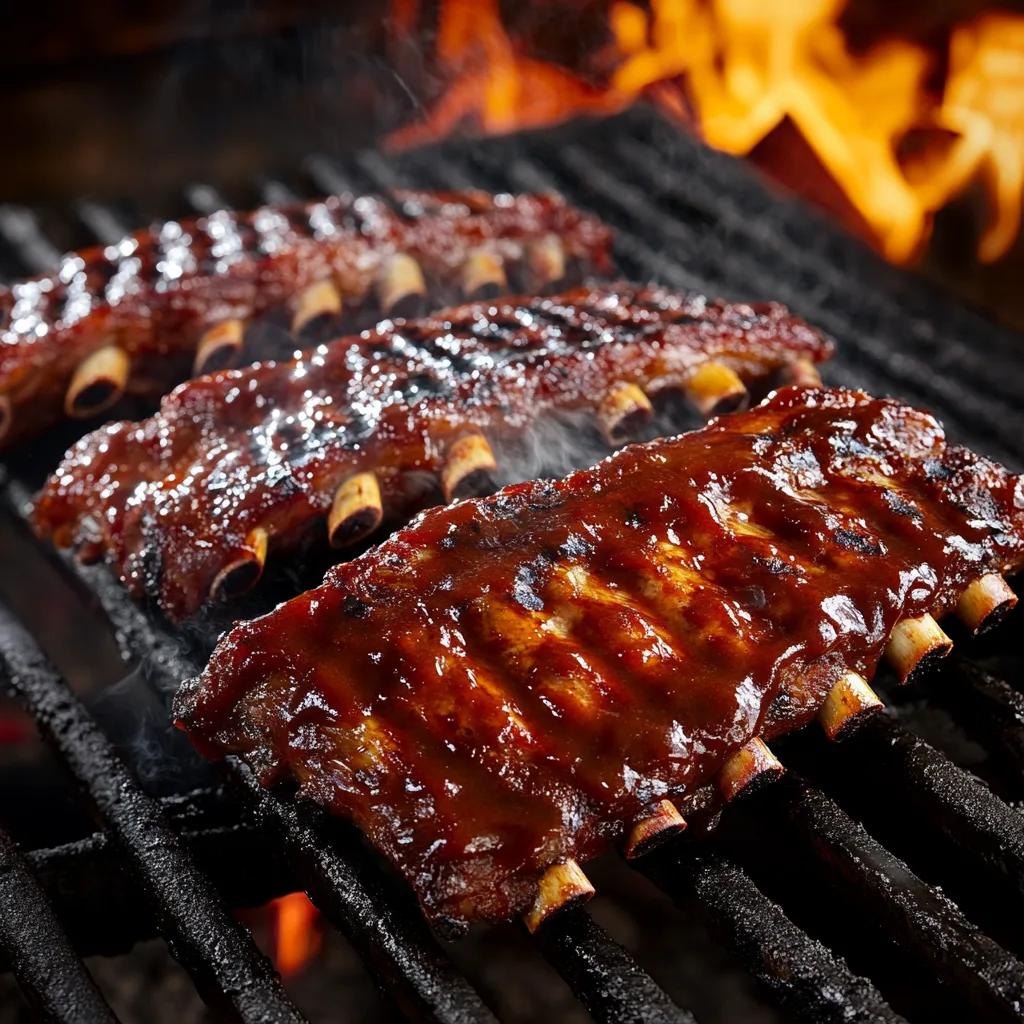
What is the 3-3-3 rule for ribs? It’s a powerful and precise technique used by BBQ pros and backyard grillers alike to smoke ribs to perfection. This method involves three distinct phases: 3 hours of smoking unwrapped, 3 hours wrapped (to tenderize), and 3 hours unwrapped again for the finishing touch. It’s ideal for large racks like spare ribs or St. Louis-cut ribs, where extra time means deeper flavor and tenderness.
This rule is often compared to the better-known 3-2-1 method, but the added hour in the middle phase allows for deeper braising and juicier results. According to the complete rib technique guide by Amazing Ribs, mastering your timing and temperature is key to ensuring the meat stays moist, not mushy.
As highlighted in the BBQGuys’ step-by-step guide on how to smoke ribs, the 3-3-3 approach is especially effective for achieving fall-off-the-bone texture while preserving a firm bark. It’s a go-to technique for those who want a true pitmaster flavor experience at home.
🔍 Breaking Down the 3-3-3 Method
1️⃣ First 3 Hours: Smoking Unwrapped
- Cook ribs on the smoker at 225°F–250°F
- Do not wrap—this phase allows bark to develop
- Spritz every 45–60 minutes with apple juice or vinegar solution
2️⃣ Middle 3 Hours: Wrapped Cooking (The Braise)
- Tightly wrap ribs in foil or butcher paper
- Add butter, brown sugar, and a splash of juice or broth inside wrap
- Place back on smoker at the same temp (225°F–250°F)
3️⃣ Final 3 Hours: Unwrapped Finish
- Unwrap ribs and return to smoker
- Optional: glaze with BBQ sauce in the final 30–45 minutes
- Let the bark set and sugars caramelize
Compared to the 3-2-1 method, this approach adds time where it matters most—in the wrapping stage. That extra hour ensures your ribs are tender to the bone without falling apart completely. It’s a fantastic method for larger racks that need more love and low heat.
💡 Why Choose the 3-3-3 Method?
- More braising time: Helps break down collagen and tough connective tissue
- Smokier bark: Extended exposure in the last phase enhances exterior flavor
- Ideal for thick cuts: Spare ribs, beef ribs, and St. Louis styles benefit most
Want to experiment with rib tenderness and meat prep before you smoke? Check out this guide to tenderizing beef ribs on Charlie Recipes—it offers complementary techniques to elevate your BBQ game even before you light the coals.
Additionally, if you’re learning to work with rib cuts or interested in perfecting the finishing texture, see how to cook perfect beef ribs for detailed prep and cook tips tailored to rib lovers.
🔪 Part 2: Preparing Ribs for the 3-3-3 Method
🍖 Choosing the Right Cut for 3-3-3
Not all ribs are created equal when it comes to low-and-slow BBQ. The 3-3-3 method is best suited for larger, meatier cuts that benefit from long braising and smoke time. Knowing which rib cut to use is the first step to success.
Best Ribs for 3-3-3 Cooking:
- Spare Ribs: Larger and more flavorful with more connective tissue—perfect for long cooks
- St. Louis Style Ribs: Trimmed spare ribs with a rectangular shape, easier to wrap and cook evenly
- Beef Ribs: Very thick and meaty; require extra time to break down
While baby back ribs can be cooked with the 3-3-3 method, they are generally better suited to shorter cooking formats like the 3-2-1 method, due to their leaner profile.
🧼 Trimming & Membrane Removal
Before seasoning or smoking, proper prep ensures even cooking and better flavor. Removing the membrane from the bone-side of the ribs is essential. This thin silver skin doesn’t break down and can block seasoning from penetrating.
Steps to Prepare Ribs:
- Flip the ribs bone-side up
- Slide a butter knife under the membrane to loosen
- Grip with a paper towel and pull off in one motion
Trimming any excess fat or flaps ensures you don’t get uneven textures or burnt edges. A uniform rack is much easier to wrap and finish evenly during the final stages of cooking.
🌿 Dry Rubs, Marinades & Flavor Boosters
The next step in rib prep is all about flavor. While some grillers swear by overnight marinades, others go straight for the dry rub and let the smoke do the rest. Either method works, as long as you’re building layers of seasoning and texture.
Classic Rib Dry Rub Blend:
- 1/4 cup brown sugar
- 1 tbsp paprika (smoked or sweet)
- 1 tbsp kosher salt
- 1 tbsp black pepper
- 1 tsp garlic powder
- 1 tsp onion powder
- 1/2 tsp cayenne (optional for heat)
Mix thoroughly and apply liberally to both sides of the ribs. Let rest for at least 30 minutes (or refrigerate overnight) to allow the rub to adhere and penetrate.
Optional Marinade Base (For Pre-Seasoning):
- 1/2 cup apple cider vinegar
- 1/2 cup water or apple juice
- 1 tbsp Worcestershire sauce
- 1 tbsp soy sauce
- 1 tbsp brown sugar
Let ribs sit in this solution for 2–4 hours before patting dry and applying rub. This combo works especially well on beef ribs or thicker cuts.
🔗 Related Flavor & Prep Guides on Charlie Recipes
- Cheesy Philly Burger – Meat seasoning and sear tips
- Healthy Beef Stir Fry – Understanding meat prep and marinating
🔥 Part 3: Smoking Ribs – Step-by-Step Guide
🔧 Equipment Checklist: What You’ll Need
Before firing up your smoker, make sure you’ve got all the right tools on hand. The 3-3-3 method requires consistent heat, moisture control, and a few key accessories to get those perfect results.
Essential Tools for 3-3-3 Ribs:
- Smoker: Pellet, offset, kamado, or electric smoker
- Wood chips or chunks: Apple, hickory, cherry, or oak are ideal for pork ribs
- Meat thermometer: Digital probe for monitoring internal temp
- Foil or butcher paper: For wrapping during phase two
- Spritz bottle: Apple cider vinegar or apple juice mix
If you’re still deciding on your setup, BBQGuys’ beginner smoking guide offers a breakdown of smoker types and accessories for all budgets.
📌 Step 1: Smoke Unwrapped (Hours 1–3)
The first phase focuses on bark development. Place the ribs directly on the smoker grates, bone side down, and allow smoke to infuse the meat without interruption—except for periodic spritzing.
Tips for the First 3 Hours:
- Maintain smoker temp between 225°F and 250°F
- Spritz ribs every 45–60 minutes to prevent drying
- Don’t open the lid too often—heat loss = longer cook times
This unwrapped phase is where smoke and rub combine to create the foundation for a deep, flavorful crust. Patience is key.
📦 Step 2: Wrapped Braise (Hours 4–6)
Once your bark is formed, it’s time to wrap. This step locks in moisture and accelerates the breakdown of connective tissue, making the meat tender and juicy.
How to Wrap and Braise:
- Place ribs meat-side down on two layers of foil or butcher paper
- Add 2 tbsp of butter, a sprinkle of brown sugar, and a splash of apple juice or broth
- Tightly seal and return to the smoker at the same temperature
This step is where the magic happens. According to the complete rib technique guide on Amazing Ribs, this middle phase is crucial for transforming tough fibers into fall-apart texture.
🔥 Step 3: Unwrap & Finish (Hours 7–9)
Carefully unwrap the ribs and place them back on the smoker to firm up the bark and add a final layer of caramelization. This stage is about finishing with finesse.
Final Touches:
- Optional: brush with your favorite BBQ sauce in the last 30 minutes
- Watch closely to avoid burning sugars in sauces or rubs
- Let ribs rest for 10–15 minutes before slicing
This final phase enhances texture, color, and flavor, resulting in ribs that are tender but still hold together beautifully—true pitmaster quality.
🔗 Related Cooking Tutorials on Charlie Recipes
- Perfect Street Corn Chicken Bowl – Smoker & grill combo guide
- Swamp Soup – Comfort food for BBQ pairing
💡 Part 4: Tips, Troubleshooting & Variations
⚠️ Common Mistakes to Avoid
Even the best pitmasters have had a rack go wrong. Avoid these classic errors to keep your 3-3-3 method on track.
Top Mistakes with the 3-3-3 Method:
- Overcooking: Going past 9 hours at high heat will dry out your ribs
- Underspritzing: Failing to spritz during the initial phase can result in a crust that’s too tough
- Poor wrapping: Loose foil or butcher paper leaks steam and prevents proper braising
- Skipping rest time: Cutting too early causes juices to run out—always rest ribs at least 10–15 minutes
🔥 Pro Pitmaster Tips for Perfect Ribs
Want to take your rib game to the next level? These techniques are trusted by competition-level smokers and serious backyard grillers alike.
Expert Techniques:
- Wrap tightly and quickly: Don’t let too much heat escape when transitioning between phases
- Glaze intelligently: Apply sauce only in the final 30 minutes and let it tack up over low heat
- Add honey or hot sauce: Sweet heat glazes elevate flavor without overpowering smoke
- Use a meat thermometer: Aim for an internal temp of 195–203°F for tender ribs
Many pitmasters use a hybrid approach—like adding a reverse sear at the end for extra crust or resting ribs in a cooler after cooking to finish with carryover heat.
🔁 Variations of the 3-3-3 Method
Not all ribs—or smokers—are the same. You may want to experiment with variations based on time, rib size, or personal preference.
Popular Rib Smoking Alternatives:
- 3-2-1 Method: More common for baby back ribs; slightly shorter cook time
- 3-1-1 Method: Quicker finish, good for leaner cuts or higher temps
- No-wrap method: Smoke the full time uncovered if you want extra bark and don’t mind chewier texture
Whether you’re following tradition or carving your own BBQ path, consistency and attention to detail are key to success.
🍽️ Perfect Pairings: What to Serve with Ribs
Nothing completes a rack of ribs like the right side dish. Pair your slow-smoked meat with bold, comforting flavors for a full BBQ experience.
Great Sides for BBQ Ribs:
- Grilled corn on the cob
- Classic mac and cheese
- Potato salad or coleslaw
- Pickles and cornbread
For hearty, cozy pairings, try something from the comfort food section at Charlie Recipes like Ultimate Turkey Soup—a great make-ahead side that warms up well and complements smoky meat.
🔗 More BBQ-Ready Dishes on Charlie Recipes
❓ Part 5: FAQs + Final Thoughts
🙋 Frequently Asked Questions About the 3-3-3 Rule for Ribs
👉 What is the 3-3-3 method for ribs?
The 3-3-3 method involves three equal cooking phases: 3 hours unwrapped in the smoker, 3 hours wrapped with liquid to braise, and 3 hours unwrapped again to firm up the bark and add sauce if desired. It’s a modified version of the classic 3-2-1 method, best for meatier cuts like spare or St. Louis ribs.
👉 Is the 3-3-3 method better than 3-2-1?
Yes, for larger and fattier cuts. The extra hour in the braising phase allows more connective tissue to break down, resulting in tender, juicy ribs with deep flavor. However, it may overcook leaner cuts like baby back ribs.
👉 Should I wrap ribs in foil or butcher paper?
Both work well. Foil traps more moisture and creates a steam-like effect, while butcher paper allows the ribs to breathe, preserving more of the bark. Choose based on texture preference.
👉 What temperature should ribs be cooked to?
Ribs are typically finished when they reach an internal temperature of 195°F to 203°F. They should be tender and pull away from the bone easily but not fall apart completely.
👉 Can I use the 3-3-3 method in the oven?
Yes! While you’ll miss out on the smoke flavor, you can replicate the texture by setting your oven to low heat (225–250°F), using foil wraps, and finishing uncovered to caramelize the surface.
👉 How do I know when ribs are done?
- The meat pulls back from the ends of the bones
- You can perform a “bend test” where the rack flexes without cracking
- A thermometer probe should insert easily without resistance
👉 What type of wood is best for smoking ribs?
Fruit woods like apple and cherry provide mild sweetness, while hickory or oak offer bold, smoky flavor. Mixing woods is common for complex profiles. Avoid mesquite for ribs—it’s often too intense for long cooks.
📘 Final Thoughts: Should You Try the 3-3-3 Method?
Absolutely—especially if you’re working with larger cuts or want competition-level results. The 3-3-3 rule for ribs is about patience, precision, and unlocking deep, smoky flavor through careful temperature and time control. Whether you’re a weekend warrior or aspiring pitmaster, this method can deliver incredible results with the right prep and equipment.
Want to expand your backyard menu? Check out Charlie Recipes’ latest guides on making the perfect Philly burger or Swamp Soup—a great make-ahead BBQ side.