What Is a Barbie Cake?
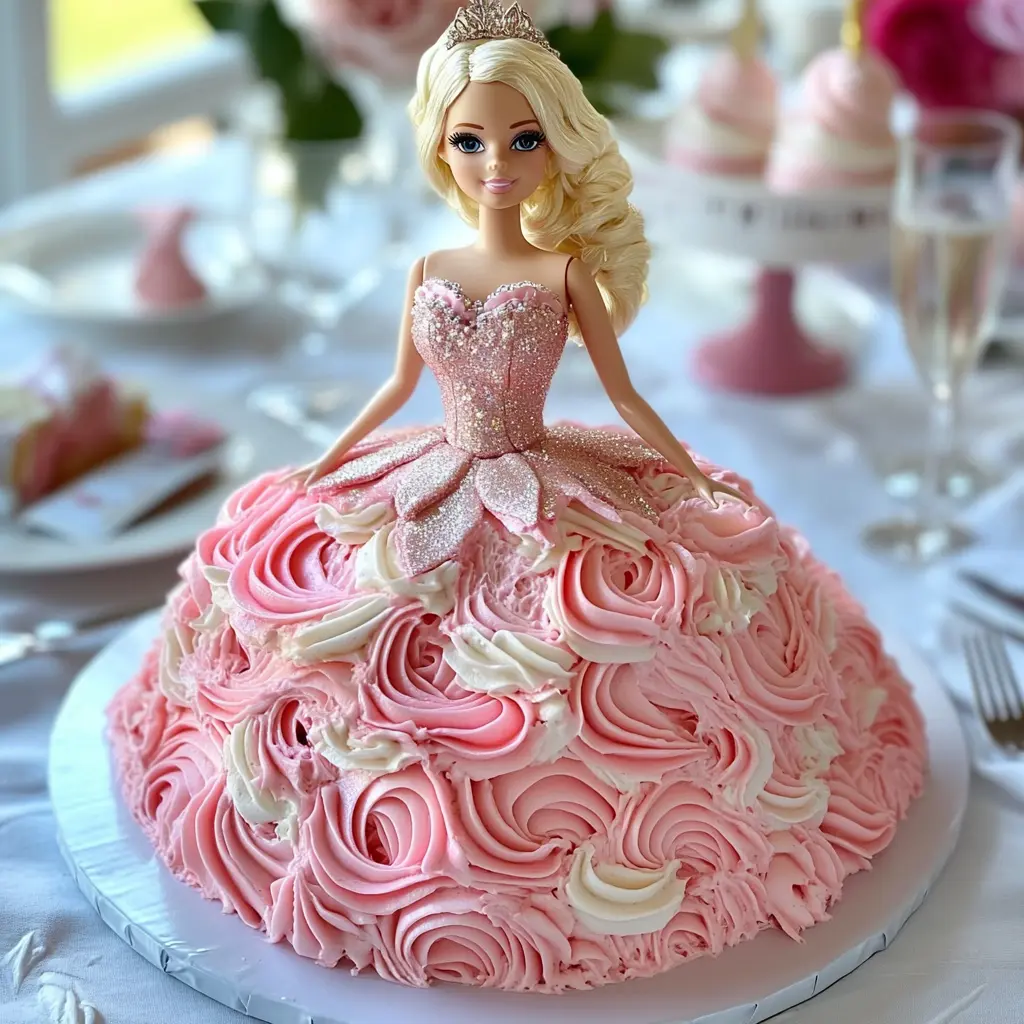
A Barbie cake is a show-stopping dessert designed to look like a doll wearing a flowing dress, with the cake itself forming the skirt. Often served at birthday parties or themed celebrations, the Barbie cake combines classic baking with a touch of whimsical fashion. A real Barbie doll (or a half-body cake pick) is inserted into the center of the cake, and the surrounding layers are decorated to mimic a dress using frosting, fondant, or both.
These cakes aren’t just delicious—they’re visual centerpieces that wow kids and adults alike, making them a go-to for princess-themed celebrations and even Barbie movie viewing parties.
Why Are Barbie Cakes So Popular?
The popularity of Barbie cakes continues to soar—especially following the release of the 2023 Barbie movie. With renewed interest in retro themes and bold pink aesthetics, these doll cakes have reemerged as a favorite trend for birthdays and social media celebrations alike.
Reasons for their continued popularity:
- Timeless appeal: Barbie is an iconic figure loved across generations
- Customization: The dress design can match any party theme
- Interactive experience: Kids love seeing their favorite doll come to life in edible form
- Photogenic: These cakes are perfect for social media and party tables
If you’re looking for other showstopping desserts, check out our moist and flavorful base cake recipe that’s ideal for sculpting and layering.
The History of Barbie Cakes
While Barbie cakes might feel like a modern invention, they’ve actually been around since the mid-20th century. The idea began in the 1950s and ’60s when doll picks were inserted into domed cakes to create the illusion of a doll wearing a ballgown. These cakes gained massive popularity in the 1980s and 1990s during Barbie’s peak merchandising boom, becoming a common birthday wish for girls across the world.
Fast-forward to today, and the Barbie cake has become more elaborate than ever—complete with fondant ruffles, buttercream ombré effects, and even Barbie-themed dessert tables. Influencers, bakers, and home decorators continue to innovate the classic design, making it a perfect combination of nostalgia and creativity.
Choosing the Right Barbie Doll
One of the first and most important steps in making a Barbie cake is choosing the right doll. Not all Barbie dolls are safe to insert directly into a cake, so here are a few considerations:
- ✔️ Full-size Barbie Doll
- Best for tall cakes (6–8 inches of height)
- Wrap the legs in plastic wrap or foil before inserting
- Hair should be tied up to stay out of the frosting
- ✔️ Doll Picks or Half Dolls
- Designed specifically for cakes
- Come with a pointed base that’s food-safe
- Can be purchased from cake decorating suppliers or online
- ✔️ Mini Dolls (for cupcakes or small cakes)
- Great for individual Barbie-themed treats
- Safer for younger kids
Tip: Always clean and wrap the lower half of the doll, even if it’s a dedicated cake pick, to keep it food-safe and mess-free.
Best Cake Types for Barbie Cakes
The foundation of a perfect Barbie cake lies in its stability. Since you’ll be stacking and carving the cake to form a skirt shape, the base must be firm enough to hold structure without collapsing under the weight of the frosting or the doll.
🎂 Ideal Cake Flavors & Types
- Vanilla Cake: Classic, crowd-pleasing, and easy to dye in pink hues
- Chocolate Cake: Rich and firm, holds its shape well
- Red Velvet: A vibrant option that pairs well with cream cheese frosting
- Lemon Cake: Bright and zesty, ideal for summer parties
- Pound Cake: Dense and perfect for carving
🍰 Cake Forms to Use
- Oven-safe mixing bowl: Used to bake a domed skirt base
- Bundt cake pan: Offers a hollow center for inserting the doll
- Stacked round cakes: Cut and sculpt to create the dress shape
🧁 Diet-Friendly Options
- Gluten-Free Barbie Cake: Use almond flour or 1:1 gluten-free baking blends
- Vegan Cake: Egg replacers and plant-based butter alternatives work well
Planning a Barbie-themed dessert table? Add these bite-sized cream puffs for the perfect matching sweet.
Tools and Supplies You’ll Need
Before you get started, here’s a checklist of essential baking tools and decorating supplies you’ll want to have on hand:
- Oven-safe bowl or doll cake pan
- Offset spatula and cake turntable
- Gel food coloring (pink, purple, gold)
- Piping bags and assorted nozzles
- Fondant, buttercream, or whipped frosting
- Barbie doll or cake pick
- Plastic wrap and toothpicks
Want to explore other crowd-favorite cakes? Try our classic coffee cake recipe for a delicious second cake at your next celebration.
Ingredients Checklist for Barbie Cake Success
Before diving into baking your Barbie cake, gather all your ingredients and tools. This helps ensure a smooth workflow—especially when timing is essential between baking, cooling, and decorating.
🎂 Cake Ingredients:
- 3 cups all-purpose flour
- 2½ tsp baking powder
- ½ tsp salt
- 1 cup unsalted butter (softened)
- 2 cups granulated sugar
- 4 large eggs
- 1 tbsp vanilla extract
- 1 cup whole milk (or buttermilk for richer flavor)
- Gel food coloring (optional, for pink or ombré layers)
🍰 Frosting Options:
- 4 cups buttercream frosting (classic or American)
- Optional: fondant for smooth dress surface
- Decorative: sprinkles, sugar pearls, edible glitter
🧰 Tools & Supplies:
- Oven-safe glass or stainless-steel mixing bowl
- Two 6-inch round cake pans
- Cooling rack
- Offset spatula and bench scraper
- Piping bags and assorted nozzles
- Plastic wrap, cake board, serrated knife
- Barbie doll or cake-safe doll pick
Pro tip: Use gel coloring instead of liquid to maintain frosting consistency and create vivid hues.
Baking the Skirt-Shaped Cake
The magic of a Barbie cake lies in the sculpted skirt. You’ll use a dome-shaped base cake along with stacked layers to build height and support the doll.
🍥 Steps to Bake the Cake Layers:
- Preheat your oven to 350°F (175°C).
- Grease and flour the inside of a stainless-steel or oven-safe glass bowl.
- Line and grease two 6-inch cake pans for the skirt’s lower layers.
- Prepare the cake batter, divide evenly among pans and bowl.
- Bake the 6-inch layers for 25–30 minutes; the bowl-shaped layer may need 50–65 minutes.
- Use a toothpick or cake tester to confirm doneness.
- Let cool completely before assembling—warm cakes may slide or melt frosting.
⏱ Cooling & Prep Tips:
- Cool cakes on a wire rack for at least 1 hour.
- Wrap layers in plastic wrap and chill for easier carving.
Need a reliable base recipe for moist layers? Try adapting our easy cinnamon apple cake for your Barbie base!
How to Insert the Barbie Doll
Once your layers are stacked and cooled, it’s time to insert the Barbie or doll pick into the center of the cake. Proper placement ensures both stability and presentation.
👗 Preparation Steps:
- Remove Barbie’s clothes and wrap legs in plastic wrap or cling film.
- If using a full-size Barbie, ensure your cake height is at least 7 inches.
- Use a serrated knife or apple corer to create a hole in the center of the stacked cake.
- Insert Barbie into the center carefully and check for balance.
⚠️ Tip:
If the Barbie is too tall, you can remove the legs and insert only the torso (use toothpicks or wooden skewers to stabilize).
Carving and Shaping the Dress Skirt
To achieve the flowing gown look, you’ll want to gently taper the cake from the base upward. Don’t worry if it’s not perfect—the frosting will add structure and shape later.
🔪 How to Shape the Skirt:
- Stack all cooled cakes on a cake board with a layer of frosting between each.
- Use a serrated knife to gently carve the outer edges into a dome shape.
- Carve small angles for a natural, flared skirt look.
- Use cake scraps to fill any gaps or smooth out uneven areas.
Remember, the crumb coat (next step) will hide minor imperfections. Don’t over-carve and risk instability.
Applying the Crumb Coat
The crumb coat is the base layer of frosting that locks in stray crumbs and provides a smooth surface for decorating.
🧁 Steps to Apply a Crumb Coat:
- Spread a thin layer of frosting over the entire cake with an offset spatula.
- Focus on covering any carved areas or gaps.
- Refrigerate the cake for 30–45 minutes to firm up.
This step helps your final coat go on smoother and prevents crumbs from appearing in the decorative frosting.
Coloring and Preparing the Final Frosting
Your Barbie’s dress deserves showstopping colors and clean piping. Whether you’re going with soft pinks or full glam sparkle, the final frosting coat brings the look together.
🎨 Mixing Colors:
- Use gel food coloring for vibrant, non-runny shades.
- Split frosting into 2–3 bowls for ombré or multi-layered designs.
- Start with light pink, then deepen with additional color drops for darker shades.
💡 Texture Matters:
- Use stiffer frosting for piping ruffles and rosettes
- Use slightly softer frosting for smooth finishes
Want even more stunning visuals on your dessert table? Pair your Barbie cake with these strawberry cream puffs for an elegant treat guests can grab and go!
Storage Tips Before Decorating
If you need to bake ahead of time or chill between stages, proper storage is key to preserving taste and texture.
⏳ Make-Ahead Options:
- Wrap fully cooled layers in plastic wrap and store in the fridge for 2–3 days
- Freeze layers up to 1 month—thaw in fridge overnight before assembling
🌡 Storage After Crumb Coat:
- Keep cake chilled if not decorating immediately
- Cover gently with plastic wrap or cake dome to prevent drying
Piping Techniques for Barbie Dress Designs
Once your Barbie cake is carved and crumb-coated, it’s time to decorate the skirt with flair. Piping is a beautiful way to create texture and detail, giving the dress life and motion. With the right technique and a few piping tips, you can turn your cake into a couture creation worthy of a runway—or birthday table!
🎀 Essential Piping Tips & Nozzles:
- Star Tip: Use for rosettes, swirls, and shells
- Petal Tip: Perfect for ruffles and pleats
- Round Tip: Ideal for outlining and dots
- Grass Tip: Can create tulle-like textures
✨ Piping Techniques to Try:
- Rosette Skirt: Swirls piped from the center outward—great for a classic floral look
- Vertical Ruffles: Petal tip pulled upward creates a gown-like ripple effect
- Basket Weave: Great for elegant, lace-inspired designs
- Ombré Layering: Use 2–3 shades of the same color to create a gradient down the skirt
For visual learners, this buttercream piping guide from Food52 offers great tips for mastering decorative buttercream finishes.
Fondant vs Buttercream: Which Should You Use?
Both fondant and buttercream can be used to decorate your Barbie cake—each offering a unique texture, finish, and level of detail. Here’s how to choose the best one for your theme and skill level:
🍥 Buttercream:
- Pros: Tasty, easy to color, great for piping
- Best For: Rosettes, ruffles, and casual designs
- Limitations: Can melt if too warm; difficult for sharp edges
🎀 Fondant:
- Pros: Smooth finish, perfect for intricate detailing
- Best For: Structured designs, bows, belts, and 3D accessories
- Limitations: Needs practice to roll, shape, and cover
🌟 Combo Option:
Use fondant for accents (like belts, bows, sleeves) and buttercream for the main skirt. This keeps the cake tasting great while adding visual interest.
Creative Barbie Cake Themes and Styles
One of the most exciting aspects of making a Barbie cake is the endless design possibilities. Whether you’re inspired by the Barbie movie, royal ballgowns, or even beach party vibes, your cake can be as unique as the celebration itself.
👑 Princess Barbie Cake:
- Classic pink rosettes or purple ombré dress
- Gold crown or sugar tiara topper
- Use edible glitter or luster dust for shimmer
🧜 Mermaid Barbie Cake:
- Scales made with fondant or petal piping
- Aqua and teal ombré dress
- Starfish, shells, and pearls as decorations
🎉 Birthday Party Barbie Cake:
- Bright, rainbow-colored layers
- Confetti buttercream or sprinkle “skirt”
- Number candle or name topper for personalization
🎬 Barbie Movie Inspired:
- Recreate iconic outfits (pink jumpsuit, gingham dress)
- Use matching doll outfits for realism
- Incorporate themed accessories like tiny purses or shoes
Pairing your Barbie cake with themed desserts? Try these cream puffs in matching colors for a coordinated dessert table!
Dress Color Combinations & Inspiration
Your color palette will set the tone for the entire Barbie cake design. Whether you go bold or soft, consistent coloring helps tie everything together beautifully.
🎨 Classic Color Themes:
- Blush Pink & White: Timeless and elegant
- Hot Pink & Silver: Glamorous and bold
- Lavender & Lilac: Soft and royal
🌈 Fun Ombré Blends:
- Light pink to deep magenta
- Peach to coral transitions
- Aqua to teal for mermaid themes
💡 Color Tips:
- Use gel food coloring for vibrant, non-runny colors
- Test colors before piping directly on the cake
- Try metallic accents with gold or silver edible paint
Need help creating smooth, level layers before coloring? Check out this leveling guide from King Arthur Baking.
Final Design Touches
The small details matter. These finishing touches can elevate your Barbie cake from cute to couture:
- Edible glitter: Adds sparkle and glam
- Fondant accessories: Bows, handbags, ruffles, and sleeves
- Sugar pearls or beads: Line the hem or neckline
- Decorative cake topper: Name and age for personalization
- Mini lights or sparklers: For dramatic birthday entrances!
Don’t forget the party backdrop. A Barbie cake pairs well with pink balloons, glittery streamers, and coordinating cupcakes or cake pops for a full display.
Frequently Asked Questions About Barbie Cakes
Here are answers to some of the most commonly searched questions about Barbie cakes, sourced from Google’s “People Also Ask” and baking forums.
🧁 How do you put the doll in a Barbie cake?
After stacking and carving your cake, create a hole in the center (about 1–2 inches wide). Wrap the doll’s legs in plastic wrap and gently insert her into the cake. If using a full-size Barbie, you may need to remove the legs or use additional cake layers for height.
🧁 Can I make a Barbie cake without a special mold?
Yes! You can bake the skirt using an oven-safe bowl or round cake pans stacked to form a dome. Carve the layers into a dress shape before inserting the doll. You do not need a dedicated doll cake pan, though it can simplify shaping.
🧁 What kind of frosting is best for a Barbie cake?
Buttercream is the most versatile and beginner-friendly frosting. It’s perfect for piping, coloring, and layering. Fondant is great for smooth finishes and accessories, but it can be more difficult to work with for first-timers.
🧁 How long does it take to decorate a Barbie cake?
Depending on your design, it can take anywhere from 1 to 4 hours. This includes time for frosting, piping, adding details, and ensuring the cake is chilled between stages. Baking and cooling are additional.
🧁 Can I make a Barbie cake a day before the party?
Absolutely! In fact, many bakers prefer assembling and frosting the cake a day in advance to allow the layers to settle and frosting to set. Just store it in the fridge in a covered cake box, then bring to room temperature before serving.
Pro Tips for First-Time Barbie Cake Makers
Want to avoid the most common hiccups? Here are some tried-and-true tips from experienced bakers to ensure your Barbie cake is a total hit:
- Chill before carving: Cold cake layers are easier to shape and less crumbly
- Use a turntable: Helps you apply frosting smoothly and evenly
- Stabilize the doll: If the doll leans or slips, use skewers or straws for support
- Keep it cool: Store the cake in a cool area or refrigerator to prevent frosting from melting
- Test colors first: Mix a small batch of colored frosting before committing to the whole design
For more prep-friendly cakes, check out our easy coffee cake recipe—great for serving alongside your Barbie centerpiece!
Common Mistakes to Avoid
Here are some pitfalls that can affect the outcome of your Barbie cake and how to steer clear of them:
- Unleveled layers: Always trim the tops of your cake layers for even stacking
- Too soft frosting: Warm or runny frosting won’t hold shape—chill it before piping
- Improper doll insertion: Make sure the cake is tall enough to support the full doll or opt for a cake pick
- No crumb coat: Skipping this step can cause crumbs to mix into your decorative layer
Pro tip: If in doubt, bake ahead of time and test the process with a mini version!
Recommended External Resources :
- Wilton – How to Make a Doll Cake – Step-by-step Barbie cake tutorial with tools and measurements
- Food52 – Buttercream Decorating Techniques – Great for ruffles, rosettes, and advanced piping
- King Arthur Baking – How to Level Cake Layers – Essential for creating a smooth, stable dress base
Barbie party dessert ideas
Perfect base cake for Barbie cakes from CharlieRecipes.com:
- Moist and Flavorful Base Cake Recipe
- Strawberries & Cream Pastry Puffs
- Crowd-Pleasing Coffee Cake Recipe
Conclusion: Make It Magical, Make It Yours
Creating a Barbie cake is more than just baking—it’s about crafting a magical centerpiece for an unforgettable celebration. Whether you’re a first-time decorator or an experienced baker, there’s no limit to the creativity you can bring to the table.
🎉 Final Takeaways:
- Choose a stable cake base for carving and stacking
- Use a crumb coat and let the cake chill for better results
- Customize your piping, colors, and accessories to fit the party theme
- Pair with matching cupcakes or cream puffs for a full dessert spread
Now you’re ready to wow your guests with a showstopping Barbie cake that’s as delicious as it is dazzling. Happy decorating!